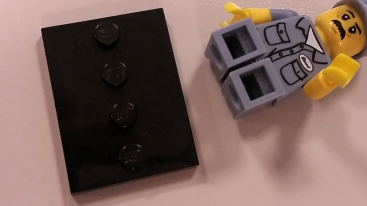
<Steps to podium> “Hi. My name is Nathan and I’m a collector.”

Collecting – it’s essentially an addiction. This veritable compulsion serves as an outlet for our inner hunter/gatherer while simultaneously stroking the ego of the hoarders we’re most likely destined to become. And you know what? It’s not such a bad thing to be! A full display shelf offers a unique type of satisfaction that is hard to come by through other means.
I’ve had my share of display shelves. Shelves are sort of a prerequisite when you’re a lifelong collector, a notorious nerd, and a kid LEGO nut turned AFOL functioning in society. If you’ve acquired some item collection-worthy item, it’s only natural to want to show it off like your own personal museum. My collection makes me happy because each piece stirs up its own unique memory or feeling. Looking at my display shelf (shelves, truthfully) is almost like flipping through a tangible photo album. The mix of items span from yesterday all the way back to my childhood.
If your situation is anything close to mine, you have a spouse that is supportive of your collecting…. to an extent. There’s a line that’s constantly walked between clutter and style. My wife has graciously allowed me to display items primarily on one wall in our bedroom. Sure, there are various items sporadically throughout the house, but it is my collectors wall that is my true pride and joy.
LEGO can be a very complicated thing to show off. When space is limited, the complications increase exponentially. After experimenting with a multitude of different techniques over the years I feel I’ve found an efficient, yet effective, balance of displayed minifigures/builds. These techniques are also pretty cost effective since I’d much rather save my money for more collectibles (or bills, or food for my children, or all those boring things).
Minifigures
When it comes to displaying LEGO Minifigures, their miniscule footprint is something that will consistently work in your favor. They typically take up such a small horizontal space that a ledge can be around an inch deep to hold them with the black base that is usually included. I recommend you use this base plate to prevent any ‘domino’ effect from slightly bumping the shelf…. a lesson I learned the hard way.

The first ‘minifig exclusive’ shelf I created was made using wood, wood glue, and black glossy spray paint. Quality materials make a massive difference in the end product here – don’t go cheap with scrap wood. Using cheaper oak planks will get you a warped/uneven ledge that isn’t as smooth as it should be for items as small as LEGO minifigures. I’ve had the most success with poplar or cedar. These wood types warp less and sand without altering the integrity of the shape.
Two planks will suffice for this shelf type. A perpendicular connection will provide a base wide enough for the stock minifigure stand. The top ledge is perfectly sized for any plate that’s two studs deep. Using the top ledge can get a tad precarious so double sided tape might be needed to ensure the plate stays put.

If you want to pack a lot into a condensed space, you can add multiple levels. This takes some patience as the glue must dry on each level prior to adding another. I made the one in the picture below to display Series 14 (the only series I’ve sought to collect in its entirety) and a few other monster-related singles.

In order to properly mount these shelves to the wall, you must be willing to drill a hole in the spot. I tried several other ways hoping to limit the amount of drywall damage – none were able to cut it like an anchored screw. Fortunately, minifigs weigh next to nothing so it doesn’t take much to secure a shelf. The best method is to drill a single hole centered in the shelf then use one 2-3 inch screw with a proper wall anchor. A major advantage to having a centrally drilled hole is you can easily shift the shelf to level it out without needing to re-drill anything in the wall.
Shelves are all well and good, but what if you don’t have enough space to mount one? Or what if you can’t do anything that will leave a lasting mark/hole on the wall? The problem I ran into is that my collection quickly surpassed the maximum capacity of the shelves I mounted. In order to make the most of the space you have all you have to do is implement some LEGO-styled ingenuity….
Here’s what you need for an individual row:
- One 2×16 plate
- Six 1×2 plates
- Two 3M Command mounting strips

This tactic allows the minifigure to stay put in a standing position with surprising stability. Five figures can comfortably fit in each 2×16 position with enough clearance to hold any given accessory. Using 1×2 plates provides enough room for them to stand upright without being forced into a bent or leaning stance. You may need to get creative with a 1×1 plate or an extra 1×2 if the minifig has any piece (like a backpack or a wide head/hair piece) that would require more space from the wall.
By using the 3M command strips you have nothing but flexibility in how rows are arranged. It enables you to make full use of a space without limiting the display via a permanent mounting. Using a level is advisable for any shelf; it helps the end aesthetic and appeases the obsessive compulsives of the world.

A portion of what my kids call “the toy museum.”

They have a surprising amount of strength considering the minimal connected bricks.
A bit more work is required for any “short-legged” minifig if you want to utilize the command strip method. Their lack of connection points on the back of their legs means they must stand. It’s still possible to do this by adding an extra 2×16 plate positioned perpendicularly with any brick meant to change build direction. This works out for the line of their heads is at the level of a normal figure so you don’t disrupt any overall symmetry on the line. You’ll need at four to five of these short figures to occupy a section – having a normal one on the same plate will stick out like a sore thumb.

Looking for an easy way to display minifigures without building anything or mounting anything? Find a wooden drawer organizer in the houseware section near the cooking utensils. These are easily obtained from Walmart or Target for between $9 and $15. It must be wooden because then you’re guaranteed to have flat surfaces as opposed to the space-conserving rounded edges of a plastic organizer. Turn the drawer organizer on its side and you instantly have a perfect display shelf. Each section is designed to hold knives, forks, and spoons yet the dimensions are perfect for your LEGO army. I found the one below at Walmart for nine bucks. It has expandable sides for additional rows. One row was glued in the expanded position while the other is there for when the need inevitably arrives. As a bonus, each level has enough surface area to accomodate minifigures with large bases. LEGO has evolved a lot in the last ten years so you can’t count on mifigures to all follow the same profile.

Sets
Diversify your arrangement with some smaller sets mixed in. With some slight modification you can show off a constructed set amongst the rows of minifigures. These sets can take up considerably more space, so you’ll like be presented with some choices to make down the road. Remember, you’re working with one of the most versitle toys ever made – it’s alright to use that to your advantage. Use additional bricks to create a stable base or shift the profile to something suitbale on a couple inches of ledge. Some builds can be shown securely on narrow shelves if you anchor them to the wall with a small section of fishing line and a clear thumb tack.

Mix up the monotony!

This would be a disaster without having it anchored – the ledge is far too narrow for the build.

Adding a jointed or clear piece can adapt a set for display.
How about full sets? Sometimes it isn’t the minifigure that prompted the purchase, it’s the build! I recently encountered this situation when I picked up the Millennium Falcon. As a set that’s as gorgeous as it is huge, I knew allowing it to sit atop a bookshelf wouldn’t do it justice. Instead, I tracked down a load of transparent bricks. The lot I bought was 1x2x2, but 2x2x2 would have worked just as well (if not better). I toyed with multiple configurations before settling on one that utilized the landing gear built in as part of the original design. The Falcon is a heavy build, so having evenly spaced mounts allowed the weight to be distributed equally enough to have an angled final position. 1×2 plates modified with handles paired with 2×16 plates created a flexible enough attachment to obtain the angle I sought. I took pictures from a few angles to demonstrate the connection along with the tremendously satisfying final result.

The Ultimate Collector’s Slave I joined recently. Thankfully, LEGO includes the means for an upright stand with the build.
Are you just as crazy as I am with showing off your LEGO treasures? What display methods do you use? I consider this an ongoing project so ideas are always welcomed. Keep building!


